Showing posts with label HDR. Show all posts

11 March 2012

Canon 50D settings for HDR Photography

In previous posts (My Canon 50D settings and My Custom Function settings on the Canon 50D) I mentioned my Canon 50D settings for general photography.
For HDR photography I use many of the same settings. There are a few exceptions which I want to explain here.

Light metering
For HDR photography consider using spot metering to measure the total dynamic range of your image.
Determine the exposure needed for the darkest and lightest spots while maintaining a constant aperture. The lowest and highest shutter speed are the lower and upper bounds of the dynamic range to be captured.

Focusing Mode
I use the following settings:
  • AF mode One Shot or AI Focus
  • Custom Function IV-1:2 Metering start/Meter+AF Start
  • Custom Function IV-2:1 AF-ON/AE lock button switch
‘Custom Function 'IV-1:2 Metering start/Meter+AF Start’ configures the Canon 50D to start focusing when a button on the back of the body is pressed (AF-On or the ‘star’ button) and not when the shutter button is half pressed. This way multiple photos can be made, while the focus is not altered.
‘Custom Function IV-2:1 AF-ON/AE lock button switch’ sets the ‘star’ button as the ‘start focusing’ button. I am using this configuration this because my previous Canon 350D body used the same button.

Live View
Consider using Live View while shooting the HDR sequence. This has several advantages:
  • The mirror does not slap up and down. This minimizes camera shake which is especially handy during long exposures
  • In Live View You can display a live histogram (press the FUNC button). This gives you an indication if you have exposed enough for the shadow detail.
Shooting Mode
Shooting the multiple photos can be done in several ways. 
When only three are needed, you can use auto exposure bracketing in conjunction with high speed continuous shooting. 

Manual shooting
In manual mode, I start shooting with the fastest shutter speed necessary.  

High Speed Continuous Shooting
I use high speed continuous shooting when I am shooting 3 pictures with automatic exposure bracketing (AEB).


20 April 2011

Shooting photos with Rick Sammon at Keukenhof and Zaanse Schans

Hand at Keukenhof Gardens

This year I visited Keukenhof for the second time. I got a chance to hang out with well known Canon Explorer of Light photographer Rick Sammon and his wife Susan. They invited me to join them to shoot some photos of the tulips, flowers and tulip fields.
It's great to see how Rick approaches a scene and explains how to take an interesting photo. You can really see why he uses the tag line ‘Explore the light’. Besides the obligatory picture card photos he learned me to look for interesting shots when the light is coming from the side or shining directly into your eyes.

110419-095239_ 9359_50D
A well known spot in Keukenhof. This spot is also featured on the back of catalogue of 2011.

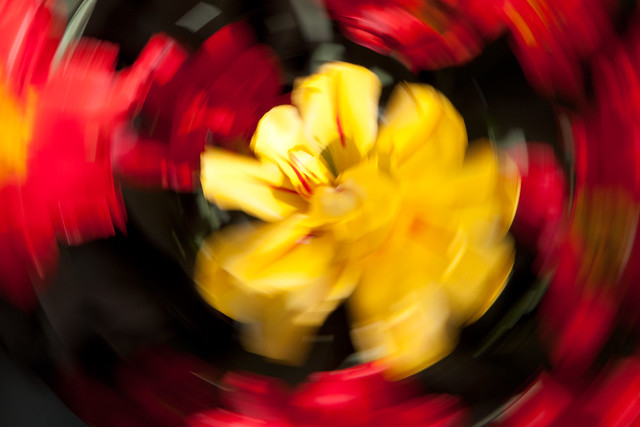
We experimented with some tulips which were backlit. This gives an interesting shadow inside the bulb.

110419-102437_ 9385_50D
Backlit Tulips in Keukenhof

The tulips really pop out the screen when they are backlit from the right angle.

110419-114749_ 9433_50D

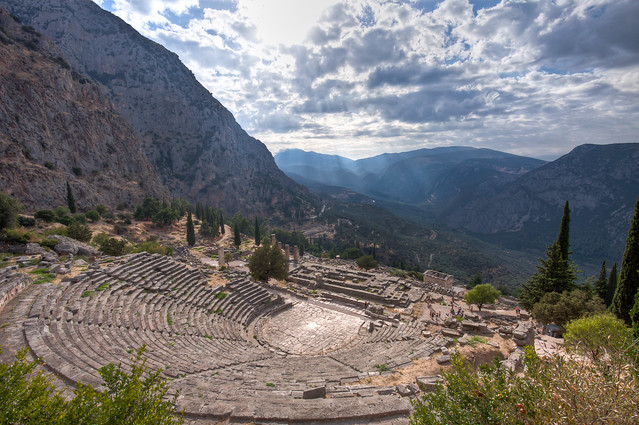
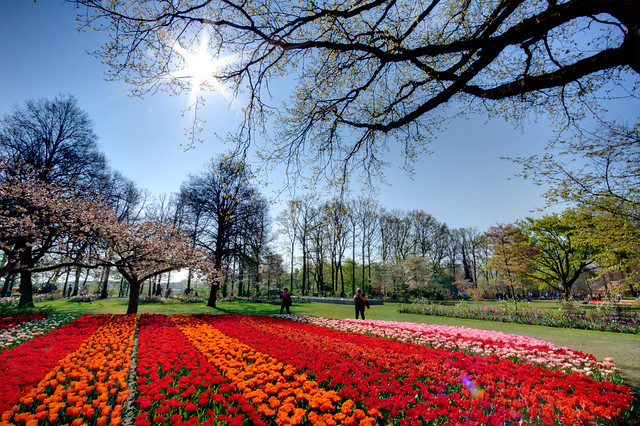
We also experimented with HDR and shooting straight into the sun. Rick encouraged me to set the aperture to f/22 and try to get the ‘starburst’ effect of the sun in the photo. It turned out rather nice!
 
110419-111259_ 9429_50D
HDR photo – Canon 50D, Canon 10-22mm, f/22 @ 1/500, 1/250, 1/30 at ISO 200

On this spot it was quite challenging to get a photo without people on it. Although you are not allowed to walk onto the grass, the flowers seem to to be too attractive and people wanted to sit very close to the fields.

110419-105207_ 9400_50D

Fortunately after a while it got less crowded and I could get another excellent starburst photo:

110419-110027_ 9410_50D

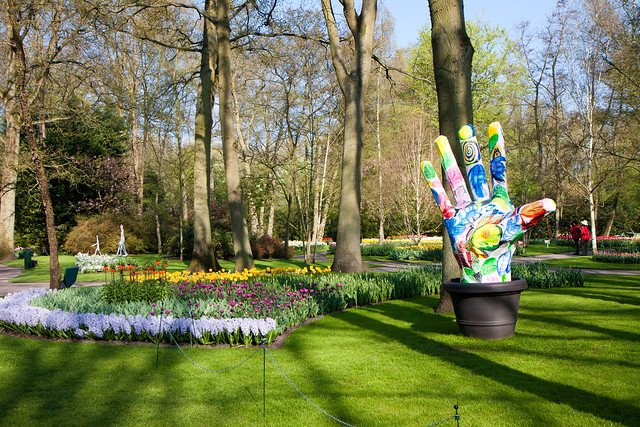
I got to try the famous ‘Sammon Swirl effect’:

110419-101509_ 9374_50D

Just outside of Keukenhof we saw some really nice flower fields.

110419-130058_ 9439_50D
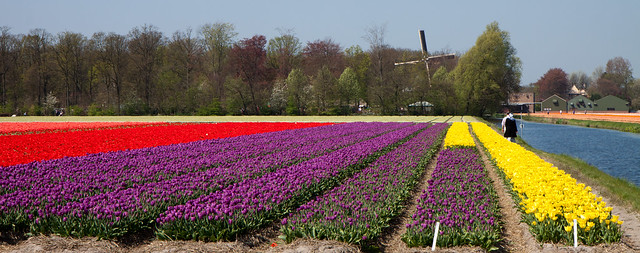
You can see a Google Street View photo of this spot on http://goo.gl/maps/2mPn. The flower field is just behind the farm called ‘Beelen’. It is alongside the road N208 as mentioned in the National Geographic article ‘Road Trip: Flower Route, Netherlands’.
Rick got some cool shots with his fisheye lens. Read his blog to see the shots!
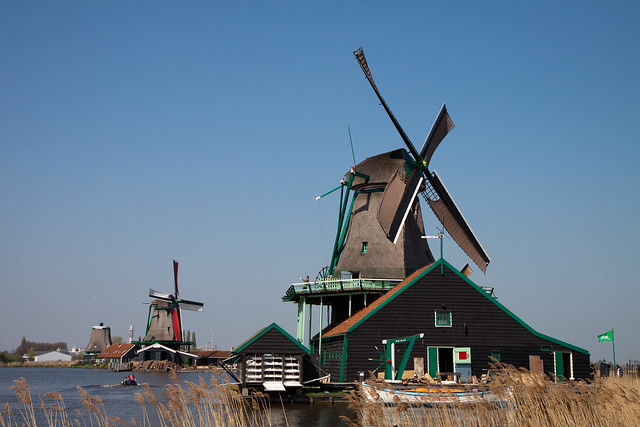
After Keukenhof we also stopped by at the Zaanse Schans.

110419-141501_ 9440_50D

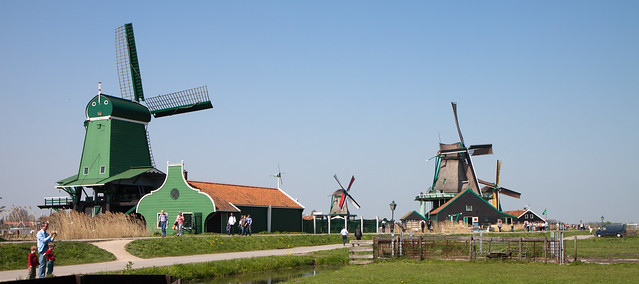
It was a really clear day, not a single cloud in the sky.

110419-141840_ 9442_50D

We also experimented with reflections. Here is an example:

110419-144847_ 9450_50D

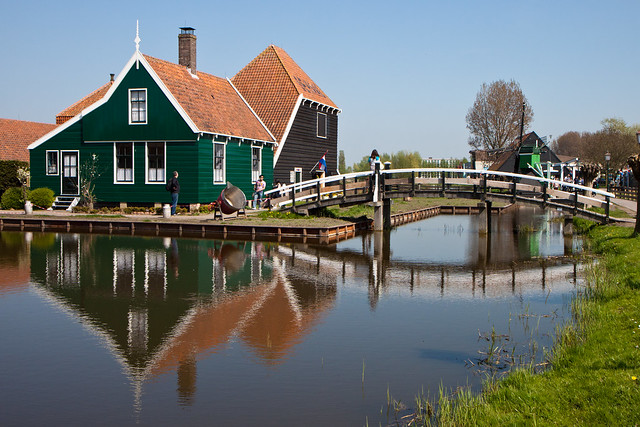
Timing is crucial, because here is what the shot looks like a few moments later:

110419-145044_ 9452_50D

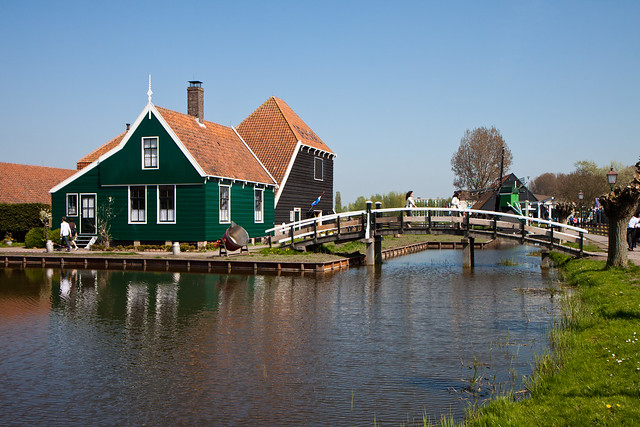
There is no reflection because a slight breeze disturbed the water surface.

Inside the gift shop I made a great HDR photo:
110419-145420_ 9454_50D
Canon 50D, Canon 17-55mm, f/5.6 at 1/40, 1/160 and 1/10 @ ISO 800

In Rick’s blog post for this day he mentions a few tips. This is how I applied them:
- You don't always have to be looking through the camera's viewfinder for a good shot.
Use the live view mode of your camera to see your composition. Or just hold the camera away from you, press the shutter button and look afterwards on the display for the result. I shot the first starburst photo that way. The camera is pointing upwards very near to the ground and it is almost impossible to take a look through the viewfinder or at the display (see also ‘Have fun’).

- Set a small aperture for great depth of field.
A small aperture helps to get everything sharp in the close-up photos and the wide shots.

- Always look up.
That’s true! I think this is one of the reasons Rick found the great spot where we got our ‘starburst’ photos.

- Take the postcard shots, and then take creative shots.
Very true. Luckily I did my share of postcard shots in 2010 so I could focus on the creative shots.

- Have fun.
It always helps to have a companion with you to discuss composition or who keeps an eye on all your photo gear when you are laying down on the ground trying to take a photo with a fish eye lens shooting upwards to a tulip (Rick and Susan: you know which situation I mean :-)

Rick travels a lot around the world. After this visit in Holland he will be in Alaska teaching a class on photographing the bald eagle. Take a look at his USA and International workshops and perhaps you can meet him one day. Highly Recommended!

Susan and Rick: thank you my friends for a wonderful time and giving me the opportunity to show you around!


06 October 2010

The Delphi Theatre

100905-092352_ 5635_50D
Canon 50D | 10-22mm @ 10mm | 1/400 – 1/1600 – 1/100 @ f/8 | ISO 200

This is the Delphi theatre at the Delphi Archeological site. HDR photography allowed me to capture the theatre and the blinding sun rays in the sky.
For comparison: take a look at the three source HDR photos.

100905-092352_ 5633_50D 100905-092352_ 5634_50D 100905-092352_ 5635_50D


05 October 2010

Athena Pronaia Sanctuary

The Sanctuary of Athena Pronaia - Delphi Tholos
Canon 50D | 17-55mm @ 18mm | 1/400 - 1/600 - 1/100 @ f/8 | ISO 200

This is the Athena Pronaia Sanctuary on the Delphi archeological site. The sunlight was very harsh, despite the clouds. An HDR photo was needed to capture the details in the sky and in the shadow sides of the rocks. Click on the photo to visit Flickr where you can view even larger versions.


03 June 2010

Moai Statue NDSM-werf Amsterdam

NDSM Terrein / Terrain Moai Statue

I found these two Moai statues on the NDSM Werf Amsterdam – a long way from home.


08 April 2010

Trajectum Lumen

Utrecht wereldbol RGB
Just opened in the city of Utrecht, The Netherlands: Trajectum Lumen – A Utrecht Tale of Light.
Trajectum Lumen is an exploration route through Utrecht passing a number of light installations which illuminate historical locations. These light artworks shine a new light on the old buildings :-)
Opened on 7 April 2010, this free exposition will continue until 2018. The exposition starts with 18 light artworks. There will be 25 in total when everything is finished. The ambition of Utrecht is to become the cultural capital city of Europe in 2018.
The artworks will be switched on from dusk until midnight. I am planning to see the artworks by myself (I wonder what HDR photography will do here).  If you want to know when dusk starts in Utrecht – use the application TPE to determine this. I have written about this in an earlier post.
Meanwhile, take a look at the video below and the photos from the press kit.


Bakkerbrug


Buurkerk
  
Ganzenmarkt


14 March 2010

What Is In Your Bag? – Part 4


Trey Ratcliff from www.stuckincustoms.com, well known for his HDR photos all around the world, tells what he is carrying with him on his travels.


08 March 2010

A Fully Programmable, Open Source Camera

Cameras are like mobile phones. Mobile phone operating systems cannot be altered easily because the manufacturer does not release its specifications. Camera operating systems are also closed. For instance, increasing the number of exposures in an automatic exposure bracketing series is not possible.

Google is trying to break open this area for mobile phones with the Android operating system. Wouldn't it also be nice change you camera operating system? These students at Stanford university are researching this area with their Frankenstein camera. Take a look at the video below. If you look closely, you will see they are using a Canon EF-S 10-22 lens for their project.


05 March 2010

Taking multiple HDR exposures automatically

For HDR photography you need to to make several photos with different exposure settings to cover the total dynamic range of the scene.
There are several ways to make this task easier:
in-camera controls
Using the in-camera controls is the cheapest way. You can set the camera to Av (aperture) mode and dial in the required exposures. Combined with auto exposure bracketing (AEB) a series of photos can be made. The disadvantage is that you can move/shake the camera during the process.

laptop / netbook
You can connect the camera with a laptop / netbook and control the camera from there. Software like DSLR Remote Pro can auto bracket the exposure.

Promote Control
promote control small

A laptop can be somewhat large and unwieldy in the field. Promote Control is a specialized remote control for you camera. It has all the features like a regular remote control with some extra tricks. Normal remote controls can only release the shutter. Some more advances remote controls have a self timer, interval timer, long exposure timer, and an exposure count. Promote Control has all that + the ability to vary the exposure – ideal for HDR photography. This is a unique product. I have not seen anything else like this. Downside is the rather high price (approximate 300 USD). Take a look at a two review videos below.


03 March 2010

Lanthorn Tower – Natural Look

Lanthorn Tower - Natural Look

This is the Lanthorn Tower in a more natural look. Which one do you prefer? This one, or the grunge looking version?


02 March 2010

Enneüs Heerma Bridge

enneus heerma bridge
Canon 50D | 17-55mm @ 17mm | 1/800 @ f/8 |  ISO 200 | Photomatix HDR 0, –2, +2 exposures.

The Enneüs Heerma Bridge (Dutch: Enneüs Heermabrug) is a bridge in the Netherlands which connects the new urban district of IJburg with the isle of Zeeburg, a borough of Amsterdam, the capital of the Netherlands.


Opunohu Bay @ Belvedere Lookout, French Polynesia

Belvedere Lookout Opunohu Bay

Canon 50D |17-55mm @ 17mm | 1/256 @ f/8 |  ISO 100 |  –2 / 0 / +2 exposures.

This is the excellent view from the Belvedere Lookout at the Opunohu Bay in Moorea. When I was there, the sun was shining almost directly into our faces (at about two o’ clock). Another perfect opportunity for HDR photography.


01 March 2010

Canary Wharf Station Roof

Roof @ Canary Wharf Station

Photo of the Canary Wharf Station roof.
Canon 50D |  1/740 @ f/4 |  ISO 200 | auto exposure bracketing –2, 0, + 2 stops.

This is what I like about HDR. You can see the building outside, as well as the details on the inside of the roof.


28 February 2010

White Tower

White Tower

White Tower @ Tower of London. Another experiment with Photomatix Pro.


25 February 2010

Lanthorn Tower

Lanthorn Tower

Lanthorn Tower @ Tower of London, England.
Experimenting with Photomatix Pro.
This photo was taken hand-held with a Canon 50D, Canon 17-55mm IS USM @ 17mm, 1/30 @ f/8, ISO 400, 0, –2 and +2 exposures, Photomatix Pro 3.2 ‘grunge’ setting.


23 February 2010

Canon 50D Auto Exposure Bracketing

expcomp

In the Canon 50D the auto exposure bracketing and exposure compensation have been combined. Instead of the usual –x, 0, +x exposures (where x is between 0 and 2) you can offset the exposures so it is possible to shoot different combinations like +4, +2 and 0.

When combined with high speed continuous shooting you can take a lot of different exposures in a short time which are handy for HDR photography. Jeff Lynch has written a blog post on how to use this creatively.


19 February 2010

Trey Ratcliff about HDR at Google

Trey Ratcliff is well known for his web site StuckInCustoms.com where he explains about all aspects of HDR photography.  Trey shot the first HDR photo which was displayed at the Smithsonian Institute. He gave a talk at the Googleplex for the Authors@Google program. Read more about it here.


21 January 2010

Atomium Spheres

Atomium spheres

This is another HDR photo I took at the Atomium, Brussels. I like the reflection in the spheres.

Here is another one during sunset (shot through dirty glass, my apologies)

Atomium Sphere at Sunset


14 January 2010

Atomium in HDR

I did some experiments with HDR near the Atomium, Brussels (Belgium). This HDR photo is made from three photos, hand-held with auto-exposure bracketing in Av mode with Photomatix Pro 3.2. You can see wonderful details, both in the highlights and in the shadows.

Can you spot the moon on this photo?