We were not allowed to use flash and we did not bring any reflectors with us.
Picture style monochrome, save photo in RAW+JPEG
The camera was set to picture style monochrome and RAW+JPEG format. This way the preview turned up in black and white so you can get a feel how the photo looks like in B&W. When the photo is right the JPEG can be used. Otherwise the RAW file contains all the colour information which can be used to make a good B&W conversion.
Exposure
Obtaining the 'correct' exposure was especially challenging inside the windmil. At first I used the Av setting to make a test photo. Based on the histogram I dialed in some extra exposure time on the subsequent photos. This soon became not practical because the exposure varied depending on the amount of 'bright areas' in the picture. I then realised that I wanted to expose for the skin and to have detail in the shadow parts. So I switched over to M(anual) exposure and set the exposure based on a spot metering of the skin. Some checks during the shooting on the histogram made sure that the highlights were not blown out in critical places.
The advantage of this approach is that the lighting on the photos is much more even than in Av mode.
Use Live View to minimize camera movement
Normally the mirror lockup function is used when you make a photo with a long shutter speed. Unfortunately on a Canon this function is buried somewhere in the menu (Custom Function III-6 on a 50D). So I used the Live View function. This way the mirror is moved up before the actual photo is taken. A Canon 50D has a dedicated button to activate Live View which is much easier than diving into the menus.
Another bonus is that I could see a preview of the photo in B&W on the display.
Use a tripod
Using a tripod makes sure your photos are not blurred by unwanted camera movement.
Look for geometric forms in B&W photos
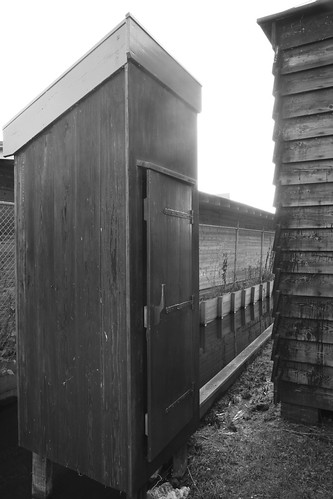
Because colour is absent in the photo, geometric forms become more pronounced in B&W photos.

In this photo of the outdoor toilet I experimented with the straight lines of the toilet house.
No comments:
Post a Comment