29 October 2009

The Restaurant at the Victoria & Albert Museum

Restaurant Victoria & Albert Museum, London

The Victoria & Albert Museum in London has a restaurant with beautiful lighting and decorations on the walls and ceiling. This is a HDR photo consisting of three separate photos. This way I can show you the details in the windows as well as the lighting mounted at the ceiling.


Gold

One of the limitations of the video capability of the Panasonic DMC-TZ7 is the maximum length of the video recording. This is 2 GB or 8 minutes, whichever comes first. Luckily Spandau Ballet Live - Gold @ O2 London 21 Oct 2009 took 7 minutes and 58 seconds!

Don't forget to switch on HD and play the video full screen to see what Tony Hadley is drinking!


28 October 2009

How to protect your notebook data while on the go

Leaving your notebook unattended is a security risk. All the information on your hard drive can be copied by persons which have physical access to the notebook.

So I always recommend using Truecrypt or some other encryption software to encrypt the data on the notebook. Only the right password gives you access to the encrypted data. This practice is considered safe, until now. Enter the 'Evil Maid'.

Rootkit-expert Joanna Rutkowska has written a tool to steal passwords from systems encrypted with Truecrypt. A person (the attacker) could install this tool to the notebook (without the owner knowing). The tool records the Truecrypt password. The attacker can come by a second time and retrieve the Truecrypt password.

The solution to this kind of attack is to use two-factor authentication on your Truecrypt configuration. 'Two factor' means you must have in your possesion:
  1. something you know (password)
  2. something you have
in order to gain access to the encrypted data.
The 'something to have' gets a little tricky. The easiest option is to have a file containing some data on an USB stick.  Truecrypt will use this file to verify the password. But files can be copied.

So, if you are really paranoid, you use a smart card as 'something to have'. This is not easy to copy (but can be stolen of course).

Even better: Do not give persons unattended access to your notebook. Store it in a safe place when you do not want to keep it with you.


True

Youtube accepts the HD videos made with the Panasonic DMC-TZ7. Look at this video below. Please press the HD button, and set the video to full screen to fully enjoy Spandau Ballet Live - True. Video was shot at 1280x720 HD resolution in MOV format.


27 October 2009

Close up of a Stingray

I got some nice responses on my photos made with my Aquapac case. So I decided to share with you a video I made with the Panasonic DMC-TZ7 and Aquapac 'camera case with hard lens'.

(Click here for a larger video)


This stingray is a regular visitor of one of the motus on Bora Bora. The nice thing with the Aquapac is that you can put your camera straight into the water (and back out again) without any worries!

The funny mechanical sound you hear on the video  is actually the auto focus mechanism of the camera. Since the camera is inside the bag, the sound of the auto focus is picked up by the microphones.


Through the Barricades

The Panasonic DMC-TZ7 has a terrific video capability. Even in low light the video function performs exceptionally. Auto focus tracking is OK, white balance is spot on. This is a good thing, because there is no manual setting to change this.

Look at this example video of how the Panasonic DMC-TZ7 performs at Spandau Ballet Live - Through the Barricades


Aquapac in Holland

I just found a dutch web site about Aquapac which contains a list of dealers in Holland: http://www.aquapac-cases.nl/


View from the National Portrait Gallery

The restaurant of the National Portrait Gallery has a nice view of London. Of course at lunch time the sun light can be rather harsh.
Excellent light conditions to experiment with HDR!

View from National Portrait Gallery London

The picture was taken with a Canon 50D, hand held, auto bracketing on -2, 0 and +2 EV, continuous high speed.
Processing was done with DXO Optics, Photomatix Pro 3.2, and Photoshop CS3.

For comparision, here is the photo at 0 EV. This is the photo which I would normally have!

091022-132927_ 7499_50d


My little Aquapac Case Review

Louk35 asked me what my experiences are with the Aquapac case I used to take underwater pictures. So I decided to write my experiences here.

All underwater pictures are on the French Polynesia trip were taken with the Panasonic DMC-TZ7 and the Aquapac 'camera case with hard lens'.


I live in Holland and ordered mine directly from www.aquapac.net.

Picture quality is good because this case has a hard plastic front. I chose this one because the lens of the Panasonic extends when you zoom in. This bag has enough room to accomodate that. The Aquapac web site has a size guide to help you choose which bag to use for your equipment.

Accessing camera controls is easy. You have to crumple the bag a bit to have some free space to wiggle the controls or push buttons.

I had no problems with leaking. When you get the bag they advise to do a 'dry run' - put some tissues in the bag, close it and hold it under water. Then check for wet tissues. My bag passed the test with no problems.

To prevent condensation in the bag you have to put a desiccant sachet in the bag with the camera.


Condensation might occur because of temperature differences between the water and the air inside the case. I saw no condensation when I used the case, and the inside of the bag and the desiccant sachet stayed dry. I ordered some extra ones at www.aquapac.net when I ordered the Aquapac case.

Hints and tips:
  • Before taking a picture, wipe the front of the tube dry. Otherwise you will get some strange pictures because there are water drops in front of the lens.
  • Make sure the lens is properly centered in the tube of the case. Otherwise the edge of the tube might pop up on your pictures.
  • Don't dive too deep with the bag. The water pressure will put pressure on the camera. The bag does nothing to prevent this. I only dod some snorkeling, so this is no issue for me.
  • Don't open the bag while on/near the water. The risk of getting water inside the camera is too great.
  • Make sure the seal is fully closed and that there is no sand in the seal. All the plastic bits inside the seals must be properly layed out. No folds or snags of any kind must be present.
  • When taking pictures under water turn up the brightness of the display. I had trouble looking at the display before I did that.
  • The Panasonic DMC-TZ7 has a special 'under water' setting. This reduces the blue and saturates the other colours. It is a plus if your camera supports such a setting. Use the  'under water' setting if available!
  • The case is also handy when you want to take pictures in the rain, in a desert, on the beach, next to the swimming pool etc. 
I am very happy with the Aquapac case, and I will certainly use it on more occasions/holidays.

Louk35: Please tell me what your experiences are with the bag. Show us some pictures and good luck!


26 October 2009

Only When You Leave

Here is another video from the Spandau Ballet Live concert @ O2 London 21 Oct 2009. The performance was terrific!


Tech note: The video was made from section 405 of the O2 stadium with a Panasonic DMC-TZ7 on a Sandisk Ultra II 8 GB Class 4 SD card. The quality is excellent considering this was taken from such a distance with 12x optical zoom, optical stabilisation and in HD quality 1280x720 pixels. You can see the glasses of water standing in front of the drums.


25 October 2009

22 October 2009

Battling dust on the sensor of my digital SLR

I want to share with you how I keep my digital sensor free of dust.
First, let me explain why this is important. My first encounter with 'dust bunnies' was in 2006:

350D DIGITAL_060323_IMG_4570

Above the horizon at the left you can see some dark spots. At first I thought the specks were from the windshield screen. Inspections of other photos made that day revealed the specks were inside the SLR.

The dust is more clearly visible at higher aperture values like f11 and higher. So how to remove the dust from the sensor.

Enter the following gadget: Visibledust Arctic Butterfly 724.


With this gadget you can pick up the dust from the sensor. Before you use the brush, you spin it with the built in electrical motor. The brush gets a static charge due to the movement. Then you put your camera in the sensor cleaning mode. Make sure you use a fully charged battery. Between swipes you spin the brush again to remove the dust and recharge it.

I use this brush to clean my sensor before every important event.
I have noticed though, that the Canon 50D picks up less dust than the Canon 350D.


21 October 2009

Home Base of the Photo Course

The photo course I am attending is held at Fotogram. I visited this address for the first time for a panorama course. Here you can see the front entrance of the building.


19 October 2009

18 October 2009

Dangerous holiday trips

As you have read before, I have swimmed with sharks. Perhaps not the most brightest thing to do, but I survived. A few years earlier, I did something similar. Look at this wonderful picure of an alligator in the Everglades National Park, Florida Keys.

350D DIGITAL_060327_IMG_4928

I am standing about 3 meters from this animal. On the way back to our car I noticed the following sign:

350D DIGITAL_060327_IMG_4936

At least the alligator didn't hiss or open his mouth...


17 October 2009

Column @ Hollywood & Highland Center

Column @ Hollywood & Highland Center
This is a HDR photo of 1 RAW file (developed at -2, 0, +2) of a column at the shopping center near the Kodak Theatre.


16 October 2009

Mirrors @ Kodak Theatre

090901-193218_ 6097_50D

Shot this picture going up an escalator. I saw something from the corner of my eye, turned around and pressed the shutter button.


15 October 2009

Lenspen

One of the gadgets I use to clean my lenses, is a Lenspen. It's especially handy for travel because it uses no liquids. I use it to remove fingerprints.


A photo a day for 64 days


No more bright sunny days, originally uploaded by blinkofaneye.
While I am struggling to make something of my project for the photo course, others are experiencing the same thing. Phil Coomes, picture editor and photographer for the BBC News website will try to make 64 pictures in 64 weeks on Kodachrome 64 in honour of this first colour film for the masses.


14 October 2009

Canon flash masterclass

A very good masterclass on flash has been posted on the Canon Professional Network. A must see for Canon flash photographers.


Views of the full face

This is a nice video on different ways to light the face.

verwijst naar: Digital ProTalk: It's Technique Tuesday This Thursday - Classical Portraiture (bekijken via Google Sidewiki)


90 senior citizens and 90 year KLM

Ninety senior citizens who had never flown before in their lives were invited for their special KLM 'inauguration' flight. Click here to see the movie.


My first digital photo on Flickr


DSCN1563, originally uploaded by mchangsp.

This is one of the first digital photos I published on Flickr. It is the mask of a man in gold sheets in a museum in Greece.


What topics do you want to read?

I am wondering what topics my readers would like to read. Please fill in the poll below, and I will get back to you.

What topics do you want to read?


Nova College Tour with Steve Ballmer

Just watched Nova College Tour with Steve Ballmer at Erasmus University (in Dutch). Good Stuff!


13 October 2009

My Custom Function settings on the Canon 50D

Here's how I have configured my 50D Custom Functions.
  • C.Fn I-5: 1 exposure bracketing sequence: -,0,+
    This sequence is easier when taking multiple photos for HDR processing on the computer.
    Note 090920: I am experimenting now with the default sequence of 0, -,+.
    The reason is that the - and the + photo can be an alternative over using all three pictures. Shooting the - and the + picture in order minimises the chance of ghosting.
  • C.Fn I-6: 1 Exposure Safety Shift: Enable
    With this enabled, the camera will change the shutter speed (in Tv mode) or aperture (in Av mode) in order to obtain a correct exposure.
  • C.Fn II-1:1 Long Exposure noise reduction: Auto
  • C.Fn III-2:2 Only external flash emits
    I don't like the light flashes which the internal flash emits to help the auto focus system.
  • C.Fn IV-1:2 Metering start/Meter+AF Start
  • C.Fn IV-2:1 AF-ON/AE lock button switch
    The functions of the AF-ON and * buttons are switched. * starts the auto focus system.
  • C.Fn IV-3:1 SET button set to Image Quality
  • C.Fn IV-5:1 Ef-D focusing screen
    I use the Ef-D focusing screen. This focusing screen has horizontal and vertical lines wich help me to get straight horizons and straight vertical buildings on the photo.
  • C.Fn IV-7:3 Assign FUNC. button Exposure comp/AEB setting
All other C.Fn settings are set to their factory defaults


10 October 2009

My Canon 50D settings

Canon DSLR's can be configured in various ways, depending on how you like to work with the camera.
I do a lot of architecture, HDR and wedding photography. This has influenced the way my camera is configured.
Here are my default settings on the 50D before putting it away (based on firmware version 1.0.7):
  • Program dial: P or Av
    I use P or Av mode so I don't have to fiddle with buttons before a quick shot. Just take the camera, switch on, focus and press the shutter button!
  • ISO: 200 or Auto
    200 for low noise pictures, or Auto so the 50D helps me to maintain a fast enough shutter speed.
  • White Balance: AWB
  • Quality: RAW + JPEG Large Fine
    I shoot RAW in case the picture needs corrections. RAW gives you more possibilities than JPEG.
  • AF Mode: AI Servo
    The 50D will keep on auto focusing as long as I press on the * button. See my upcoming post on C.Fn IV-2:1 AF-ON/AE lock button switch why I do this.
  • Drive mode: single shot
  • Beep off
    Don't annoy your surroundings with beeping noises. Your camera shutter makes enough sound!
  • Shoot w/o card off
    Highly recommended! To prevent you think your are shooting pictures on a card, when you are not.
  • Peripheral illumin. correct. Enable
  • Color Space sRGB
  • Picture Style Standard
  • Highlight enable
    The ' blinkies' warn me which parts of the photo are over exposed.
  • AF Point disable
  • Histogram RGB
  • Image jump w/ Screen
  • Auto Power Off 4 min.
  • Auto rotate
  • INFO. button Camera set.
  • Aperture: f4
I have also various Custom Functions settings which differ from the defaults. I will explain them in an upcoming post.


09 October 2009

Second session at the photo course

I just attended the second lesson at the photo course. Topics covered:
  • Basic explanation of how a CCD sensor is used to create a digital image.
  • Histogram. What it is and why use it.
Pictures from all students for the "own project" of all students were also discussed. There were some nice series about light and shadow and "a person and his/her dog". My pictures do not immediately classify as a "series". They are too direct, leave nothing for imagination (this is my own conclusion). I need something so "the sum means more than the individual parts".

We also looked at some pictures by Ansel Adams. His photos are still one of the best examples of excellent composition, exposure and contrast. Watch the Youtube video below to learn more about how Ansel lived and what he did in the dark room.


Dear Inspiration


08 October 2009

Optech Rainsleeve

Our teacher at the photo course gave us the advice to buy the Optech Rainsleeve to protect our cameras against water on our outdoor sessions. On the second lesson a student asked me where you can buy the item.
Here are some links to (web) shops which sell the rainsleeve:
  Click on the names of the shops to see more information.


How to name your digital photos on your computer

It is important to have a strategy how to name your digital photos. At first I had one folder for each shooting session. This became soon too cumbersome and error-prone, because I couldn't find the photos I was looking for, and the name of the folder had no structure.

Since 2005 I use the following strategy to store and name my digital photos. The files are stored in a hierarchy of folders. I divide the photos in several folders based on the date and time the photos were taken. Each year has its own folder. Photos taken in a year are further subdivided into subfolders.
  • Each year has its own folder.
    Example: a folder with the name '2009'.
  • Within the 'year folder' I have a folder for each month, starting with 01 and ending with 12.
    Example: photos taken in the month October are stored in the folder 2009\2009-10
  • Within the 'month folder' I have a folder for each day when one or more photos were taken.
    Example: 2009-10-07
  • Each digital photo has a name with the form yymmdd-hhmmss_nnnn_ccc
    yy = year ranging from 00-99 (2000-2099)
    mm = month ranging from 01-12
    dd = day ranging from 01-31
    hh = hours ranging from 00-23
    mm = minutes ranging from 00-59
    ss = seconds ranging from 00-59
    nnnn = unique number, generated by the camera
    ccc = label for camera used (Downloader Pro generates this label)
    Example: 50D, 350D
Example of full path and file name:
2009\2009-10\2009-10-08\091008-170100_1423_50D.JPG

The directory structure prevents that you get folders with hundreds of files packed together.
The advantage of long file names with these fields is that the photos are sorted on date and time taken when you sort the file list by name. I can combine my pictures with pictures from other photographers, sort the list by name and view all the pictures in chronological order. There are no problems with files with same names, or photos which are out of order.
The unique number is necessary when you are shooting multiple photos within a second. My Canon 50D is capable of shooting 6 frames per second. Without the unique number, all photos would have the same name.


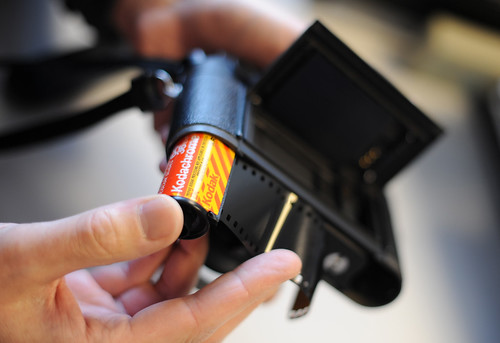
The above folder structure and filenames are automatically generated when I download the pictures from my memory cards to my computer. Downloader Pro (http://www.breezesys.com/Downloader/) takes care of this. I have also instructed Downloader Pro to insert EXIF fields with my name and e-mail adress into the file. This way every file is copyrighted. And when I upload the file to Flickr the original file name will automatically be filled in the Flickr description field.

My Downloader Pro 2.1 settings are:
  • download directory: d:\user\\pictures\{Y}\{Y}-{m}\{Y}-{m}-{D}
  • filename template: {d}-{t}_{J} {r4}_{T3}
  • auto-rotate JPEGs after downloading
  • use image capture time for timestamp
  • add IPTC/XMP data to downloaded images
  • IPTC/XMP Caption - Data - Description: {d}-{t}_{J} {r4}_{T3}.{e}


Photos for EP1

I have just selected some photos for EP 1 (= eigen project 1 = own project 1).
The photos will be discussed at the photo course.
At the moment 112 elephants are on display in the city of Amsterdam. They form the Elephant Parade. As a theme I chose the eyes of the elephants.
My first picture is an interesting one, because it contains a map of the area where I live.

091007-132419_ 7153_50d

You can see the other pictures in this Flickr set.

091007-144923_ 7166_50d


06 October 2009

Light - Science & Magic


One of the upcoming topics on the photo course will be how to handle contrast and light in a photo. I guess I have to brush up on my theory and re-read the book "Light - Science & Magic". This book is the classic text on photographic lighting. It covers almost everything you have to know about light:
  • What is light?
  • What is reflection and how do you handle it?
  • Everything you need to know about surfaces
  • How to reveal shape and contour
  • How to photograph metal and glass
  • Various lighting setups (basic, fill, hair, ...)
  • Extremes - contrast handling
  • Strobe lights
I especially liked the tricks on how to take photos of glass. Glass by itself is transparent and is not always clear to see. The book explains how to photograph glass against a black background. This is also known as dark-field lighting.

Recommended reading!


Berlin Reichstag


Berlin Reichstag, originally uploaded by mchangsp.
We visited the Reichstag building in Berlin.
Tip: To beat the queue at the main entrance, reserve a seat for the restaurant on top of the building.
Then you can enter the building through the side entrance, and have a great view from the restaurant. Don't forget to order someting!


04 October 2009

Now you see flash, then you don't

In my previous posting I wrote about learning how to take better pictures with flash. I also learned some tricks from Neil Cowley how to use flash without anyone noticing it on your photo. His tutorial is a must-read!


070808_350D_IMG_9241


(Yes, flash was fired in this picture :-)


Staircase in Theatro Museum Dali


Staircase in Theatro Museum Dali, originally uploaded by mchangsp.
Staircase in Theatro Museum Dali. This is the original picture. No black/white conversion done.


03 October 2009

Belvedere Lookout Panorama in Moorea, French Polynesia

One of the main attractions on the island of Moore, French Polynesia is the Belvedere Lookout. From this lookout you have a wonderful view of (from left to right) Opunohu Bay, Mount Rotui and Cook's Bay.


Click on the interactive panorama to see a much larger view. Remember: click on the last button in the tool bar below the panorama to view the panorama full-screen


02 October 2009

A Stick Figure Guide to Computer Encryption

A very gentle and funny introduction into data encryption. Enjoy!


Guerilla Panorama of Westermarkt, Amsterdam

Normally you do the following when shooting a panorama:
  1. find a good spot to place your tripod
  2. place your panorama head on the tripod
  3. level the tripod so you will get a straight panorama
  4. mount your camera on the panorama head
  5. shoot the panorama pictures
Sometimes you cannot do all those steps. It takes too much time or the people around you will start asking questions.
I experienced this first hand when taking this panorama of Westermarkt, Amsterdam


During the panorama course the teacher explained it is also possible to take the pictures without the tripod and panorama head. During postprocessing you correct for not holding your camera horizontal.

So he gave us an assignment to take pictures for a panorama free-style in the neighbourhood of the Westerkerk.

I found a good spot on the corner of the Westermarkt (note the 'V' on the panorama) and started to take pictures. One of the guys from the benches came to me. He asked me to stop taking pictures because they did not want to be recognizable on the photo. Before I could say something the teacher helped me out: he said we were learning to take pictures so chances are very slim that anything recognizable would be seen on the picture. Besides, persons would be about 5 millimeters tall on a computer screen, because we were learning to take 360 degree panoramas. So they should not expect any problems...

The guy left us alone, and I could finish this panorama - 'guerilla style': take the pictures and go away before more persons start asking questions.

So: don't tell anyone that you can click on the thumbnail to see a larger panorama where you can identify the guys on the bench and you can see that the other students have not even begun to take pictures!


The Canon Flash Bible

One of the topics in the photo course will be taking a photo with (automatic) flash. A must read for Canon photographers is what I call the Canon Flash Bible.

When you have read all the material on automatic flash, proceed to Strobist to learn all about non-automatic flash!


Photomatix Pro

On the photo course one of the students showed some HDR photos. The rest of the class was interested in the software used to create the image.
It turned out to be Photomatix Pro. Before buying Photomatix, make sure to search for discounts.


I have feelings, too


I have feelings, too


The most famous dog on the Internet.


01 October 2009

Papiermolen de Schoolmeester

One of our assignments will be a session at this location: Papiermolen de Schoolmeester.
We will get instructions on how to cope with (high) contrast situations.
The address and details are:
De Schoolmeester, Guispad 3 te Westzaan, is doorgaans geopend:
op werkdagen van 10.00 tot 16.00 uur en op afspraak. Van 16 t/m 20 november 2009, evenals van 21 december 2009 t/m 4 januari 2010, is de Schoolmeester gesloten.
Inlichtingen: tel. 075 6214465


First evening at photography course

This evening I went to the first day of the photography course.
There were 12 persons. Most of the men work in an IT related job... (why is this the case?)

We got an even tougher assignment.
Next time we have to present a set of photos which form together a 'series'. I suspect they must have a common theme or something...


Photos for the photo course

As I have mentioned before, I have to take two photos with me for the photography course.
I have selected two photos to take with me:

The hall at Natural History Museum, London.
Natural History Museum


Walking in the Siq towards Petra
Walking towards Petra

I want to be able to make nice pictures of people, like the one Matt Adcock made on 9 September 2001.


Maps of Los Angeles and Santa Monica

Here are the maps of Santa Monica / Marina Del Ray and Los Angeles I used in 2009.